
Setting up a home theater in a compact space doesn’t mean sacrificing quality sound or immersive viewing. With thoughtful planning, the right seating arrangement, and strategic equipment placement, you can create a dedicated entertainment space that rivals commercial theaters, even in a bedroom, bonus room, or basement corner. The key to a successful small home theater layout is understanding your space’s dimensions, choosing configurations that work within those constraints, and making intentional decisions about acoustics and lighting. This guide walks you through every step of designing a functional, comfortable home theater that fits your home and budget.
Table of Contents
ToggleKey Takeaways
- A successful small home theater layout starts with accurate room measurements and a simple floor plan to prevent costly placement mistakes.
- Use the 1.5-to-2.5× rule to calculate ideal viewing distance: for a 55-inch TV, viewers should sit 7–11.5 feet away to balance picture clarity and resolution.
- Invest in a quality center-channel speaker and subwoofer over multiple surround speakers, as they handle 80% of dialogue and immersion in compact spaces.
- Control lighting with blackout shades and dimmable LEDs, and apply basic acoustic treatment like fabric panels or heavy drapes to reduce reflections without overspending.
- Build a functional small home theater on a budget by choosing between a flat-screen centered layout, front-projection setup, or hybrid approach based on your room’s dimensions and depth.
- Position seating 18 inches away from obstructions, use tiered risers if ceiling height allows, and angle rows 10–15 degrees toward the screen for optimal comfort and sight lines.
Assessing Your Space and Layout Options
Measuring and Planning Your Room
Before buying a single piece of equipment, grab a tape measure and take detailed measurements of your target room. You’ll need the width, depth, and height, plus any obstructions like closets, windows, or HVAC vents. Write these dimensions down, don’t rely on memory. Measure twice if you’re unsure.
Next, mark where light enters (windows, ceiling lights) and note any existing outlets or networking. A small room (10×12 feet or less) works well for home theater, but you need to know if you’re working with 7-foot or 9-foot ceilings, since mounting options and speaker placement depend on head clearance.
Sketch a quick floor plan on graph paper or use a free tool like SketchUp Free. This doesn’t need to be architectural, just an accurate representation showing door swings, wall outlets, and the viewing wall. This single step prevents costly mistakes later.
Choosing Between Common Layout Configurations
Most small home theaters fall into one of three configurations:
Front-Projection Setup: A projector mounted on the ceiling or rear wall throws an image onto a fixed screen or painted accent wall. This works brilliantly in rectangular rooms where viewers sit 8–12 feet from the screen. The projector, calibration, and a quality screen demand budget, but you get a cinema-style experience without a massive TV eating wall space.
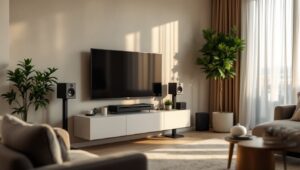
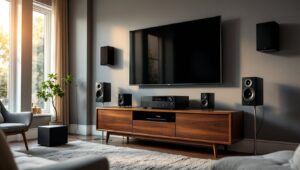
Flat-Screen Centered Layout: A wall-mounted TV (55–75 inches typical) serves as your display. It’s the most common approach for small spaces because TVs are easier to calibrate than projectors, and prices have dropped. Place the screen at eye level when seated, roughly 24–36 inches from the floor. Avoid mounting it higher unless you’re committed to permanently reclined seating.
Hybrid Approach: Use a smaller TV for everyday viewing and a projector that deploys when needed. This requires more planning but maximizes flexibility in tight quarters.
Your room’s aspect ratio (width-to-depth) dictates which works best. A square room tolerates any layout. A long, narrow room favors front-projection because viewers can sit farther back. A short, wide room (like a studio apartment) might demand a flat screen positioned carefully to minimize viewing angles beyond 35 degrees from the center seat.
Optimizing Seating Arrangements for Comfort and Viewing
Seating is where small home theaters succeed or fail. Cramped, poorly positioned seats will torture you through a feature film, no matter how good the picture and sound.
The Sweet Spot: Calculate your ideal viewing distance using the 1.5-to-2.5× rule. If your TV is 55 inches (measured diagonally), multiply 55 by 1.5 to get 82.5 inches (about 7 feet). Your primary seating should land between 82–137 inches (7–11.5 feet) from the screen. Too close and details blur: too far and you’re missing picture resolution.
For a projector screen, the math stays the same. A 100-inch projected image works best at 10–16 feet of viewing distance, which is why projectors suit rooms with depth.
Tiered or Riser Seating: If your budget allows and your ceiling height permits, a 12-inch riser behind the primary row clears sight lines for rear seating. This doesn’t require construction, you can use risers built from pressure-treated lumber (2×8 and 2×12 joists with plywood decking, secured to floor studs if needed). Confirm local building codes for riser height and handrails: some jurisdictions require permits for raised platforms over 12 inches. Many DIYers skip this and simply use recliners in a single row because it’s simpler.
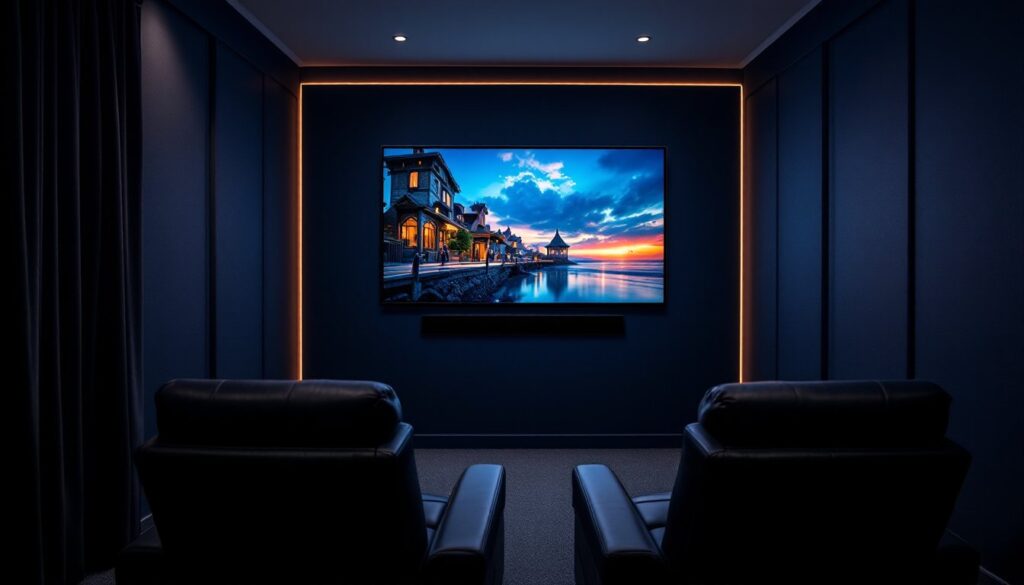
Seat Selection and Layout: Theater-style recliners or sectional sofas work best. Recliners let viewers adjust leg support, which matters during long movies. A 3-seat row needs roughly 9 feet of wall width (recliners are about 3 feet each). For a very tight space, swap recliners for a quality sectional, just ensure seating depth isn’t more than 36 inches so no one’s neck cranes toward the screen.
Leave at least 18 inches between the back of the front row and any obstruction. Allow 12–18 inches of walkway space in front of the seating for cleaning and movement.
Positioning matters too. Angle rows slightly, no more than 10–15 degrees, toward the screen. This is easier with recliners than fixed seating. Avoid placing the seat against the back wall: leave at least 2 feet for speaker placement and cable management.
Audio and Video Setup Best Practices
A common mistake is overspending on a TV while underfunding the sound system. Audio makes or breaks immersion. Small rooms actually struggle with surround sound because speakers positioned at ear level in a compact footprint create timing and phase issues. The good news: you don’t need five or seven speakers to create impact.
Stereo and Center Channel Foundation: Start with a quality soundbar or bookshelf speakers as your left and right channels, plus a center-channel speaker mounted directly below (or above, in projector setups) the screen. These three handle 80% of movie dialogue and action. A center speaker is non-negotiable, it anchors dialogue to the screen.
If budget is tight, a good soundbar with a dedicated center mode replaces separate left/right/center and frees wall space. Soundbars don’t offer true surround, but they’re practical for small rooms where adding surround speakers creates acoustic headaches.
Subwoofer Placement: A single compact subwoofer (10–12 inches) handles low frequencies. In small rooms, bass modes boom if the sub sits in a corner, try positioning it 1–2 feet away from walls first, then adjust based on listening tests. Run the sub’s level at 75 dB when measured at your listening position (use a smartphone decibel meter app, not your ear). Place it away from the primary seating to avoid one seat getting pounded.
Small-room surround options exist, but getting surround sound in. Overhead speakers or Dolby Atmos-enabled height channels are easier to integrate without clutter.
Video Setup: Mount or position your TV at eye level when seated. If using a projector, aim for ceiling-mounted installation to minimize shadows. Calibrate your display out of the box, don’t rely on preset “vivid” or “dynamic” modes. Many TVs ship with color settings that are inaccurate. Use a calibration disc (Spears & Munsil High Definition Benchmark is industry standard) or hire a professional calibrator for $300–600 if accuracy matters to you.
Run video cables (HDMI 2.1 for 4K) in conduit along walls if possible, keeping them away from power lines to minimize interference.
Lighting, Acoustic Treatment, and Design Elements
Lighting Control: Blackout capability is essential. Install light-blocking roller shades or thermal curtains on any windows. For ceiling lights, swap standard bulbs for dimmable LEDs and install a dimmer switch (ensure the bulbs are actually dimmable, not all LEDs work with old-style dimmers). Add one or two bias-lit LED strips behind the TV or screen (neutral white, 6500K color temperature). This reduces eye strain without washing out the picture.
Recessed lighting is ideal but requires opening the ceiling. For renters or non-permanent setups, surface-mounted track lights with dimmers offer control without renovation.
Acoustic Treatment: Small rooms amplify bass and create flutter echoes (repetitive reflections that make speech sound thin). You don’t need full acoustic panels everywhere, that’s overkill and kills the room’s aesthetics.
Start simple: place a fabric absorption panel on the wall opposite the screen to tame reflections. DIY soft furnishings work too, heavy drapes, upholstered furniture, and carpeting all absorb sound. Avoid hard parallel walls facing each other: even placing a bookshelf or room divider breaks up reflective surfaces.
For smart home technology and connected devices, automated motorized curtains and smart lighting let you dim everything with a remote or phone before pressing play.
Design and Aesthetics: Keep the space functional, not theme-parked. Paint walls a dark, matte color (dark gray or navy) to reduce screen glare and make the TV feel larger. Avoid bright accent walls, they distract viewers. Install cable management conduit before mounting gear: exposed cables look messy and invite accidental unplugging.
Consider your layout’s impact on the room’s daytime use. If the home theater shares space with a bedroom or living area, modular furniture and screens that hide the TV when not in use maintain a balanced aesthetic. Life & Style at can inspire designs that blend entertainment with everyday comfort.
Budget-Friendly Solutions and DIY Tips
Building a home theater doesn’t require six figures. A solid starter system, TV, soundbar, subwoofer, media player, runs $1,200–$2,000. Scaling up to separate speakers, projection, and acoustic treatment pushes it to $3,500–$5,000+. Much depends on room prep and your willingness to DIY.
DIY Furniture and Risers: Recliners are pricey, but a quality sectional from online retailers ($800–$1,500) paired with throw pillows works fine for casual viewing. If you want a riser, build one using 2×12 pressure-treated lumber (actual depth 11.25 inches) as the deck and 2×4 studs as a frame. A 12-inch rise over a 10×8-foot platform costs $200–$400 in materials. Ensure the deck is screwed (not nailed) to the frame, and secure the whole assembly to the floor joists every 16 inches with lag screws. Get a local contractor or inspector to review if you’re uncertain, risers can be safety-critical.
Cable and Conduit: Run speaker wires and HDMI in 1-inch PVC conduit stapled along the wall (paint it to match). This is cheaper and neater than in-wall installation, which requires permits in some jurisdictions. Conduit costs $1–$2 per foot and is easily removed if you move.
Acoustic DIY: Absorptive panels cost $100+ per panel. Instead, repurpose a used bookshelf, hang heavy curtains, or cover a frame with Rockwool 60 (rigid fiberglass insulation) and burlap fabric. A DIY 2×4 frame panel with Rockwool runs $30–$50 and absorbs mids and highs effectively. Don’t leave fiberglass exposed, it’s an irritant. Wrap it in fabric or plastic sheeting.
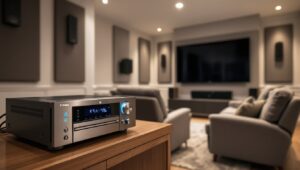
Second-Hand Equipment: Used projectors and AV receivers depreciate quickly. Check local marketplaces for last-gen models. A 2–3-year-old receiver does everything a new one does. Just verify it has the inputs you need (HDMI, optical audio) and ask about the remote, those are expensive to replace.
Negotiate Final Costs: Video is optional. Many DIYers skip calibration (TVs are close enough out of the box) or use room correction software bundled in modern receivers instead of hiring a pro. These shortcuts save $300–$600 without ruining the experience for casual viewers.