
Setting up a home theater system doesn’t have to feel like decoding a spaceship manual. The Yamaha 650W 5.1 channel 3D home theater system delivers immersive surround sound and crystal-clear dialogue without requiring an engineering degree. Whether you’re upgrading a living room or building a dedicated media space, this guide walks you through every step, from unpacking and positioning speakers to dialing in audio settings. You’ll learn exactly how to get the most out of your investment and avoid the common missteps that leave systems sounding muddy or unbalanced.
Table of Contents
ToggleKey Takeaways
- The Yamaha 650W 5.1 channel 3D home theater system delivers 650 watts of RMS power across five speaker channels, making it ideal for rooms up to 15×20 feet with integrated amplification that eliminates receiver complexity.
- Proper speaker placement—front speakers at ear level angled inward 15–20 degrees, center speaker above or below the display, and surrounds 1–2 feet above ear level and rear—is essential to achieving immersive surround sound without muddy or unbalanced audio.
- Use 14 AWG speaker wire for runs under 50 feet and maintain proper polarity (red/positive, black/negative) to prevent bass cancellation and preserve surround imaging.
- Calibrate your system by measuring distances from the listening position to each speaker, setting center channel volume to match front speakers, and keeping surrounds about 3dB quieter for optimal spatial balance.
- Set the crossover to 80Hz so the subwoofer handles low frequencies while small speakers focus on midrange and treble, preventing strain and maximizing impact.
- Monthly dusting and annual connection checks, combined with proper ventilation clearance of 2–3 inches around the amplifier, will extend your home theater system’s lifespan and maintain peak performance.
System Overview And Key Specifications
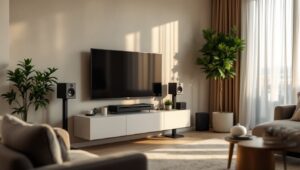
The Yamaha 650W 5.1 channel system packs serious power into a compact footprint. The amplifier delivers 650 watts total RMS distributed across five speaker channels: front left, center, front right, and two surround speakers. That’s enough headroom to fill a 15×20-foot room without struggling during action sequences or dynamic music passages.
The system includes a dedicated center channel speaker for dialogue clarity, this is the workhorse that makes every word from actors and narrators punchy and intelligible. The subwoofer handles low frequencies independently, adding rumble to explosions and depth to musical soundtracks. The two surround speakers create the ambient envelope that makes you feel like action is happening around you, not just in front of you.
3D surround capabilities mean the system processes height cues from Dolby Atmos or DTS:X content, though you’ll need compatible speakers or ceiling-mounted units to fully unlock this feature. For standard 5.1 Blu-ray, streaming, or cable content, the system excels without extra hardware.
Why Choose A 5.1 Channel Configuration
A 5.1 setup is the sweet spot between immersion and complexity. Unlike simpler 2.1 systems that only have left and right channels, 5.1 adds dedicated center and surround speakers that fundamentally change how sound behaves in your room. Dialogue anchors itself to the screen, ambient sounds pan smoothly across your listening space, and effects genuinely surround you.
Compared to 7.1 or 9.1 systems, 5.1 requires less speaker cabling, fewer calibration points, and less room treatment to sound excellent. You’re not paying for unnecessary channels you won’t use in a typical living room. Recent home technology buying guides confirm that 5.1 remains the most practical entry point for serious home theater without overwhelming most spaces or budgets.
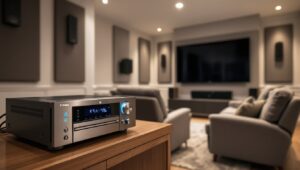
The Yamaha’s all-in-one amplifier means no receiver hunting, component matching headaches, or complex power management. Everything’s integrated, so setup becomes straightforward and troubleshooting is simpler if issues ever arise.
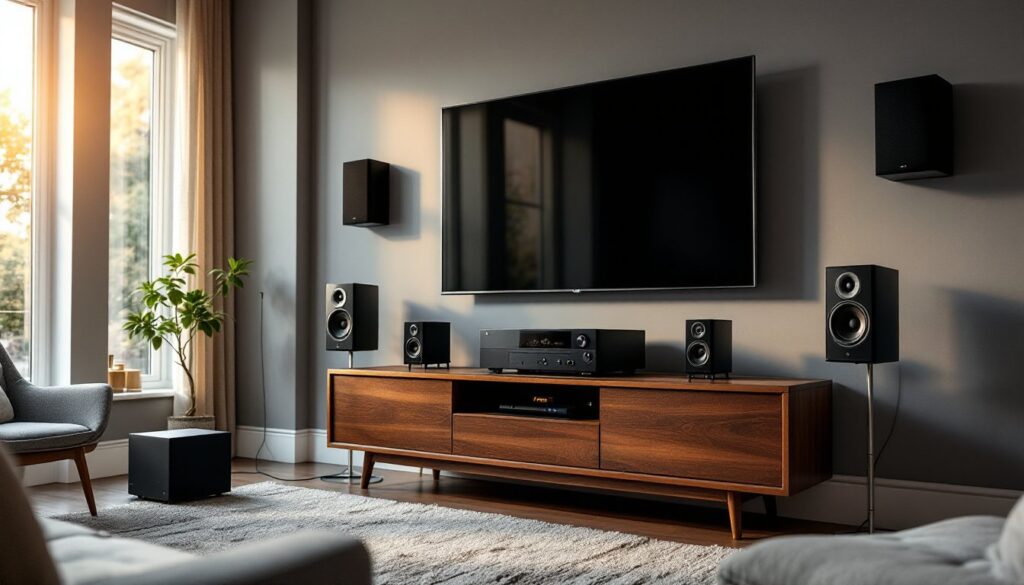
Installation And Placement Best Practices
Proper placement is non-negotiable. Bad speaker placement will sabotage even excellent equipment. Start by measuring your viewing distance, this determines speaker height and angle. Your seating should be roughly 8–12 feet from the front speakers for a natural soundstage.
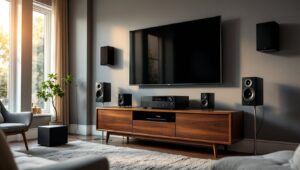
Front left and right speakers mount at ear level (roughly 30–36 inches high) when seated, angled inward about 15–20 degrees toward the listening area. This creates a cohesive sound bubble rather than isolated left and right channels. The center speaker sits directly above or below your display, at the same ear level when possible. Mounting it below is acceptable if it clears furniture.
The subwoofer location matters more than most DIYers realize. Try placing it in a corner first, bass waves reflect off boundaries, creating deep output. If you hear boomy, muddy bass, move the sub to the side wall or away from corners. Bass response is room-dependent: there’s no universal “correct” spot until you listen.
Surround speakers position 1–2 feet above ear level, roughly 1–2 feet to the side and rear of your seating. They should create a diffuse, ambient effect, not point directly at listeners’ heads. Use wall brackets to clear floor space and reduce clutter.
Speaker Positioning For Optimal Surround Sound
Once physically placed, angle matters. Front speakers converge toward the listening area’s center point, imagine them aiming at a spot roughly 3 feet above the middle seat. This focuses the soundstage and prevents the “speakers are talking to each other” effect amateur setups suffer from.
Surround speakers shouldn’t be ear-level or louder than front channels. They add spatial information and reflections, not direct sound. Run speaker cable along baseboards or in-wall cabling (check local codes: some jurisdictions restrict in-wall runs). Keep cables away from power lines and heating ducts to minimize hum and interference. Leave at least 6 inches of slack at connections for troubleshooting later.
Connectivity And Wiring Setup
The Yamaha 650W system accepts multiple input sources: HDMI, optical (Toslink), coaxial, and RCA connectors. HDMI is your priority if your source device supports it, newer TVs, Blu-ray players, and streaming devices all use HDMI, which carries both video and audio in one cable. This minimizes clutter and ensures full-bandwidth sound transmission.
Optical connections work perfectly if HDMI isn’t available. They’re immune to electrical interference, making them reliable in noisy electrical environments. Coaxial is similar but less common on modern equipment. Connect your cable box, Blu-ray player, or streaming device using the cleanest path, ideally one dedicated input per source, though you can daisy-chain if needed.
Speaker wire gauge matters. Use 14 AWG (American Wire Gauge) or thicker for runs under 50 feet: longer distances need 12 AWG or better to avoid resistance and signal loss. Twist paired wires together to reduce hum and electromagnetic interference. At the amplifier, respect red (positive) and black (negative) conventions, reversed polarity cancels bass and destroys surround imaging.
Group all cables in one area, separate from AC power cords if possible. Use cable ties or channels to keep your install tidy and prevent accidental disconnects. Test each speaker individually before finalizing placement, disconnect the sub, disconnect surrounds, and verify front speakers pass signal. This isolates problems if they emerge.
Optimizing Audio And Video Settings
Out-of-the-box, your Yamaha system needs calibration. Most amplifiers ship in a neutral, flat state. Access the system menu (usually via a physical remote or app) and jump into audio settings. Set your distance measurements from the main listening position to each speaker, most systems have an SPL (Sound Pressure Level) meter built in, or you can use a smartphone app. Distances tell the amplifier how to time-align speakers so sound from all five channels arrives at your ears simultaneously.
Adjust individual speaker levels so all channels deliver similar volume at your seating position. Center should match fronts: surrounds should sit about 3dB quieter. The subwoofer needs its own volume knob, start at 50% and adjust up or down based on whether low-frequency impact feels balanced or overwhelming. Recent smart home automation reviews highlight how modern systems include wireless calibration apps that simplify this step.
Crossover settings determine which frequencies each speaker reproduces. Set your center, surrounds, and mains to 80Hz crossover, anything below that goes to the subwoofer. This prevents small speakers from struggling with bass and lets the sub shine. For video, ensure your TV and source devices are set to PCM stereo or Dolby Digital output: only enable advanced formats (Dolby Atmos, DTS:X) if your system and content support them.
Maintenance And Long-Term Care
Home theater systems are tough, but they need minimal upkeep. Dust speaker grills monthly, dust buildup muffles high frequencies and traps heat. Use a soft brush or cloth: avoid compressed air near drivers (the moving cone and coil). Wipe the amplifier and subwoofer with a dry microfiber cloth.
Never block ventilation vents on the amplifier or sub. These components generate heat during extended use. Ensure at least 2–3 inches of clearance around cooling slots. Avoid placing the system in closets, cabinets without ventilation, or direct sunlight.
Check speaker connections annually. Temperature and humidity fluctuations can loosen terminals over time. A quick wiggle of each connector ensures tight contact. Keep your remote’s batteries fresh and store in a dry place, moisture corrodes battery contacts. If you’re away for extended periods (more than two weeks), consider unplugging the amp to prevent trickle-current drain on your home’s electrical system. When returning, power on and let the system idle for 10 minutes before playing demanding content, thermal stabilization prevents stress on components. Tested recommendations from product experts consistently emphasize that basic maintenance habits add years to audio equipment lifespan.