
A shaker style bathroom vanity brings timeless appeal to any bathroom renovation. Rooted in the minimalist design philosophy of the Shaker movement, this vanity style combines clean lines, functionality, and understated elegance, without the fussy details that date quickly. Whether you’re updating a powder room or overhauling a master bath, a shaker vanity works as a solid anchor piece that pairs well with traditional, farmhouse, or even contemporary aesthetics. This guide walks you through what makes shaker vanities special, how to choose the right one for your space, and what to expect during installation and maintenance.
Table of Contents
ToggleKey Takeaways
- A shaker style bathroom vanity combines clean lines, recessed panel doors, and honest craftsmanship that never looks dated, making it a timeless investment across traditional, farmhouse, and contemporary design styles.
- Shaker vanities are available across all price points—from budget-friendly stock options ($400–$800) to premium hardwood models ($5,000+)—with consistent proportions and design integrity at every tier.
- Proper sizing and installation are critical: measure your space carefully, ensure the vanity is level, secure it to wall studs, and use proper plumbing techniques to prevent water damage and costly repairs.
- Maintenance of a shaker bathroom vanity is minimal and straightforward—regular dusting, damp-cloth cleaning, monthly inspection under the sink, and re-caulking every 2–3 years keeps it in excellent condition for 15+ years.
- Shaker vanities pair seamlessly with quartz, marble, granite, or solid-surface countertops, and hardware finishes like brushed nickel, oil-rubbed bronze, and brass allow endless styling flexibility to match your bathroom design.
What Defines Shaker Style Bathroom Vanities
Key Design Characteristics and Materials
Shaker style draws from 19th-century furniture craftsmanship emphasizing simplicity, quality, and honest joinery. A shaker bathroom vanity features recessed panel cabinet doors (sometimes called “five-piece” doors: a center panel surrounded by a frame), straight legs, minimal ornamentation, and clean hardware placement. There’s no fancy molding, applied trim, or turned details, just solid proportions and visible craftsmanship.
Materials typically include hardwoods like oak, cherry, maple, or walnut, though quality plywood with hardwood veneers is common in mid-range vanities. The frame-and-panel construction allows wood to move naturally with humidity changes without cracking. Drawer fronts and cabinet sides use the same recessed panel design for visual consistency. Hardware is usually simple: brushed nickel, oil-rubbed bronze, or black bar pulls positioned for function rather than ornamentation.
The cabinet base sits on tapered legs (usually 4–6 inches tall) that create visual lightness and make cleaning under and around the vanity easier. The sink top or countertop, commonly quartz, marble, granite, or solid surface materials, rests directly on the cabinet frame. Backsplashes are optional but, when included, stay minimal: a simple 4–6 inch tile or material strip behind the faucet area.
Interior hardware reflects the minimalist ethos: soft-close hinges (a modern upgrade), simple plumbing lines, and organized shelving or drawers for daily essentials. No hidden electrical or decorative elements, what you see is what you get.
Why Shaker Vanities Remain a Popular Choice
Shaker style stays relevant because it solves real problems. The recessed panel design hides dust and fingerprints better than flush-face cabinets. The simple geometry means fewer places for water to collect, reducing maintenance headaches. And because shaker vanities avoid trendy details, they don’t look dated in five years, a kitchen or bathroom styled with shaker cabinetry still feels current a decade later.
This style also works across price points. Budget-conscious DIYers can find stock vanities from big-box retailers starting around $400–$800. Mid-range custom or semi-custom options (from specialty cabinet makers or high-end retailers) run $1,200–$3,000. Premium hardwood vanities with integrated sinks and marble tops can exceed $5,000. The proportions and details remain consistent, so a well-made affordable shaker vanity shares the same design DNA as a luxury piece, it’s about material grade and finish, not stylistic compromise.
Shaker vanities also pair seamlessly with most design languages. In a traditional bathroom, they’re an obvious fit. In a farmhouse-styled space, their honest simplicity complements shiplap and vintage hardware. In a modern or contemporary bath, the clean lines and lack of fussy detail create a sophisticated anchor that balances chrome fixtures and sleek tile. Designers and homeowners appreciate this versatility, which partly explains their enduring popularity.
Shaker Vanity Styles and Finishes
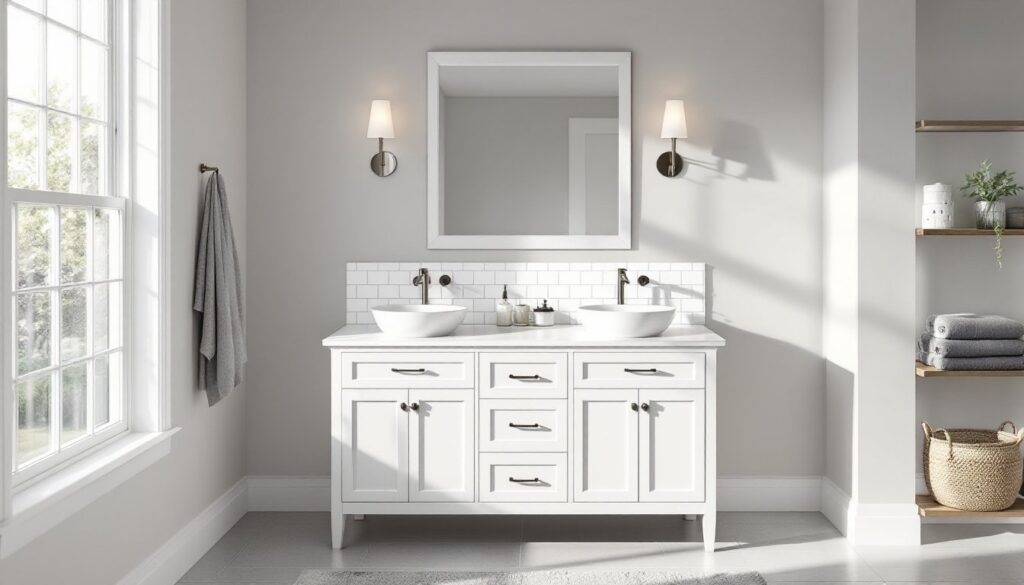
Shaker vanities come in two primary cabinet styles: single-sink (24–30 inches wide) and double-sink (48–60 inches wide). Single-sink models suit compact bathrooms or powder rooms: double-sink vanities anchor spacious master baths and work well for couples sharing morning routines.
Finish options define the personality. Natural wood finishes celebrate the grain: unfinished oak emphasizes texture, while stained cherry or walnut adds warmth. Painted finishes come in whites, creams, grays, and deeper tones like navy or charcoal. White or cream painted shaker vanities feel bright and cottage-like: gray or black provides contemporary edge. Many mid-range vanities use a combination: painted base with natural wood top or painted lower cabinets with a natural stained frame.
Countertop materials pair with the vanity style. A natural wood vanity with a honed marble top suggests classic elegance. A white painted shaker base with quartz or engineered stone reads modern-farmhouse. Butcher block tops warm up the look but require sealing and maintenance. Glass or stainless counters are less common but work in industrial or modern contexts.
Hardware finishes should echo the vanity and overall bath design. Oil-rubbed bronze and brushed nickel are safe, versatile choices. Polished chrome suits contemporary baths. Black or matte black hardware brings modern minimalism. Brass hardware is trending and pairs beautifully with natural wood shaker vanities in traditional or transitional bathrooms.
When browsing bathroom remodel inspiration, you’ll see shaker vanities styled across the spectrum, from cottage-simple to refined modern. That flexibility is part of their strength.
Sizing and Layout Considerations for Your Space
Start with measurements. Measure your bathroom width, depth, and existing vanity size (if replacing). A vanity should leave at least 12–15 inches of clear floor space on each side for comfortable movement and access to plumbing or storage underneath. If your bathroom is tight, a 24-inch single-sink vanity fits most constraints. For a master bath or family bathroom, 36–48 inches offers practical storage and countertop work space.
Ceiling height matters too. Standard vanities are 30–32 inches tall (not including the countertop, which adds 1–2 inches). Wall-mounted or floating vanities can feel taller and work in smaller spaces, though installation requires reinforced framing behind drywall. Comfort is subjective: some people prefer a lower vanity (around 28–30 inches): others like a taller one (34–36 inches) to reduce bending. Test by leaning over a similar-height table or vanity in a showroom.
Consider storage needs. A 24-inch single-sink has one or two drawers and a cabinet below. A 30-inch model typically adds another drawer. A 48-inch double-sink offers substantial storage: multiple drawers, shelving, and side cabinets. Think about what you actually store: hair tools, medications, cleaning supplies, towels. Open shelving above the vanity can offset limited cabinet space, though it requires decluttering discipline.
Plumbing location is critical. If you’re moving the vanity, rerouting water supply and drain lines is doable but adds cost and complexity. If the existing vanity is in the right spot, measure the rough-in (the hole or space for the sink and faucet). Most new shaker vanities come with predrilled sink holes, but you may need a plumber if the existing drain and supply rough-in doesn’t align. home design inspiration platforms to see how various bathroom sizes accommodate different vanity widths and configurations.
Installation Tips and DIY Considerations
Installing a shaker vanity ranges from simple (dropping in a pre-finished unit) to moderate (securing it to studs, connecting plumbing). Assess your skill level honestly. If you’ve assembled furniture and have basic plumbing knowledge, you can likely handle installation yourself. If plumbing is unfamiliar or you’re uncertain about wall anchoring, hire a plumber or contractor.
Before you start: Shut off water supply lines and check them for leaks. Remove the old vanity by disconnecting P-traps (the curved pipe under the sink), unscrewing supply lines, and unbolting the cabinet from the wall studs. Have a bucket handy for residual water. Clean the wall and floor thoroughly: old caulk, adhesive, and debris can prevent proper seating.
Positioning and securing: Slide the new vanity into place and check it’s level using a torpedo level (a 24-inch level works best). Shim with plastic shims under the legs until the top is perfectly level, this prevents sagging and water pooling. Screw the vanity into the wall studs (typically two or three fastening points along the back). Use 2.5-inch wood screws through the vanity frame and into studs: this holds the weight and prevents tipping.
Countertop installation: If the vanity doesn’t come with an integrated top, you’ll set the countertop next. Granite, marble, or quartz tops often require template installation by the fabricator. Simpler laminate or solid-surface counters can sometimes be set by the homeowner using construction adhesive and fasteners. Follow the manufacturer’s instructions.
Plumbing connections: Connect P-traps and supply lines, hand-tightening first, then using an adjustable wrench to snug the connections (don’t over-tighten, which strips threads). Use Teflon tape or plumber’s putty on threaded connections to prevent leaks. Turn the water back on slowly and watch for drips at joints. Small leaks are normal at first: tighten slightly if they persist. Test the drain and make sure water flows and doesn’t back up.
Finishing touches: Caulk the perimeter where the vanity meets the wall and floor using silicone caulk (more flexible and waterproof than latex). Install the backsplash if planned. Attach the faucet to the countertop (pre-drilled holes) or integrate it into the vanity depending on the design.
Common DIY mistakes include skipping the level check (resulting in water pooling or unstable appearance), failing to secure the vanity to studs (especially risky with double sinks and stone counters), and over-tightening supply lines (which causes leaks). If you’re unsure at any step, consult a plumber. Water damage is expensive: getting it right saves headaches. A professional interior design consultation can also guide you on layout and final aesthetic choices if you’re uncertain about placement or styling.
Maintaining Your Shaker Vanity
Shaker vanities require modest upkeep. Wood care is straightforward for painted vanities: wipe with a damp microfiber cloth and dry immediately. Avoid prolonged moisture exposure (water pooling or dripping), which swells wood and causes finish damage. For natural wood finishes, dust regularly and use furniture polish or mineral oil monthly to keep the grain conditioned.
Clean the countertop daily. Quartz and granite resist staining but benefit from a gentle spray cleaner and microfiber wipe. Marble etches with acidic cleaners (lemon, vinegar): use a pH-neutral stone cleaner instead. Wipe spills immediately, especially around the sink. A sealed stone tops or engineered surfaces shouldn’t harbor bacteria if cleaned weekly.
Inspect under the sink monthly. Look for slow drips or moisture accumulation, which signals failing connections or caulk. Tighten any loose supply lines by hand. Replace the P-trap if it’s corroded or leaking. Soft-close hinges occasionally need adjustment: if they close too fast or too slow, tighten the adjustment screws on the hinge (usually a small Phillips or hex screw).
Caulk deteriorates over time, especially in high-moisture bathrooms. Re-caulk every 2–3 years or when you notice gaps, mold, or separation. Remove old caulk with a caulk remover or putty knife, clean the joint thoroughly, and apply fresh silicone caulk.
Hardware rarely needs attention beyond occasional tightening if screws loosen. If a hinge or drawer track fails, replacement hardware is usually inexpensive and straightforward to install.
With steady, simple care, a quality shaker vanity lasts 15+ years without major repair.