
A chimney style range hood is more than functional ventilation, it’s often the centerpiece of a modern kitchen. These tall, sculptural units rise from the cooktop to the ceiling, making a bold design statement while pulling smoke and odors out of your cooking space. Whether you’re renovating a dated kitchen or building new, understanding how chimney style range hoods work, what sizes and power levels you need, and how to install one properly will save you headaches and money. This guide walks you through everything a homeowner or DIY enthusiast needs to know before buying and installing a chimney style range hood.
Table of Contents
ToggleKey Takeaways
- A chimney style range hood combines bold kitchen aesthetics with superior ventilation, capturing smoke and odors while making a dramatic design statement above your cooktop.
- Proper CFM rating is essential: calculate your hood’s airflow needs using the formula (cooktop BTU ÷ 100) + 100, and increase by 20–30% if you cook frequently with high heat.
- Correct installation height (24–30 inches above the cooktop), wall stud anchoring, and a dedicated electrical circuit are non-negotiable for safe and effective operation of a chimney style range hood.
- Direct ductwork with minimal bends provides the most efficient venting; avoid flexible foil ducts and limit 90-degree bends to two maximum to maintain optimal airflow.
- Regular maintenance—including monthly baffle filter cleaning, quarterly exterior wipe-downs, and biennial ductwork inspections—extends hood lifespan to 15–20 years.
- Island-mounted chimney hoods require higher CFM ratings than wall-mounted models because vapors escape sideways more easily, so factor in your cooktop location when sizing.
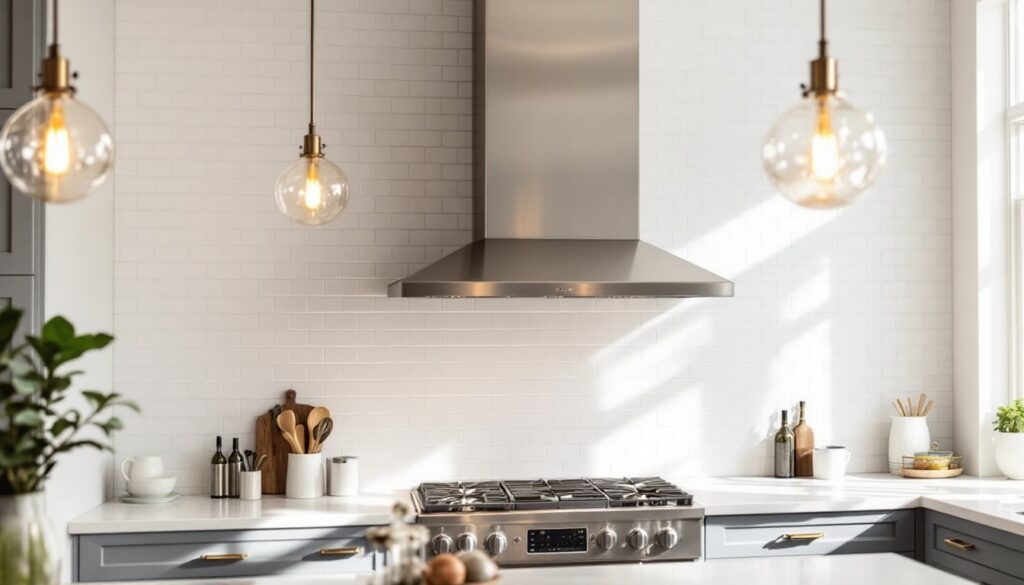
What Is a Chimney Style Range Hood?
A chimney style range hood is a vertical ventilation unit that extends from above your cooktop all the way to the ceiling or soffit. Unlike under-cabinet hoods tucked into cabinetry, chimney hoods are freestanding or wall-mounted structures that dominate the space, and that’s by design.
These hoods contain an internal blower motor and damper that capture cooking vapors, grease, and smoke before they settle onto your walls and cabinets. Air is pulled through a filter or baffle, then exhausted outdoors via ductwork. Some models recirculate air back into the kitchen using charcoal filters, though ducted venting is always more effective if you can manage it.
Chimney hoods come in two main categories: island hoods hang from the ceiling above an island cooktop, and wall-mounted hoods attach directly above a range positioned against a wall. Both styles offer dramatic visual impact and superior capture efficiency when sized and installed correctly.
Design and Aesthetic Benefits
One reason chimney hoods dominate high-end kitchen remodels is their versatility. Available in stainless steel, matte black, painted finishes, copper, or custom colors, a chimney hood can anchor an entire kitchen aesthetic, whether you’re going industrial, farmhouse, or minimalist modern.
Unlike recessed or under-cabinet hoods that hide away, a chimney hood is proudly visible. This makes quality craftsmanship and finish important: a dented or poorly finished hood looks cheap, while a sleek, well-proportioned one elevates the entire room. Many designers choose a hood finish to echo other kitchen elements, stainless steel appliances, cabinet hardware, or even lighting fixtures.
The vertical lines of a chimney hood also influence the perceived height of your ceiling. A tall hood in a kitchen with standard 9-foot ceilings can make the space feel more generous. On the flip side, a poorly proportioned hood, too narrow or too short, can make a room feel cramped. Remodelista and other design-focused resources showcase how hood proportions and finishes tie together a kitchen’s entire visual story.
Key Performance and Ventilation Features
The real work of a chimney hood happens inside. CFM (cubic feet per minute) measures how much air the blower moves per minute, this is your primary performance metric. A basic rule of thumb: you need 1 CFM for every 10 BTUs your cooktop produces, plus an additional 100 CFM minimum. A typical electric range produces 5,000–7,500 BTUs per burner: a gas range outputs 10,000–15,000 BTUs or more.
Filters matter too. Baffle filters (layered metal channels that separate grease) work better than mesh screens and are easier to clean: they simply remove from the hood and rinse in the sink. Charcoal filters (used in recirculating models) capture odors but clog faster and must be replaced every 3–6 months.
A damper prevents backdrafting, outside air or odors from other parts of the house flowing back into the kitchen when the hood isn’t running. Motorized dampers close automatically and are quieter than spring-dampers. Look for hoods with variable fan speeds so you can run low-speed for light cooking and high-speed when searing or frying. Good Housekeeping’s testing of range hoods highlights how top-performing chimney-style models balance power with noise levels and filter longevity.
Installation and Mounting Considerations
Proper installation is non-negotiable. A poorly installed hood won’t vent effectively and might even create negative pressure in your home, pulling odors from your furnace or bathroom exhaust back into the kitchen.
Location and Clearance: The hood must sit 24–30 inches above the cooktop, check your hood’s manual for the exact requirement. Wall-mounted hoods need solid structural backing: you’ll be anchoring the bracket to wall studs, not drywall alone. If studs aren’t positioned correctly, a contractor can install a horizontal support beam (a doubled header) to distribute the load across studs. Island hoods hang from the ceiling and require ceiling joists to run perpendicular to the hood for safe mounting.
Electrical: Most range hoods need a dedicated 120-volt circuit (some high-power units need 240V). This is not a DIY matter if you’re unfamiliar with electrical codes, hire a licensed electrician. Local building codes vary, but the National Electrical Code (NEC) governs most work. Permit requirements often apply to electrical changes: check with your local building department before starting.
Ducting and Venting Options
Venting method determines ventilation quality. Direct ductwork (a straight or minimally bent path to the outside) is ideal: each 90-degree bend reduces airflow, so limit bends to two maximum. Use smooth metal ductwork (not flexible foil duct, which restricts airflow and traps grease). Ductwork should slope slightly toward the outside to prevent grease and condensation from dripping back into the hood.
Through-wall venting exits directly through an exterior wall, the shortest path and most efficient. Roof venting requires more ductwork, increasing resistance, but works if your cooktop is centered in an island. Both routes need a proper exterior vent cap with a damper and rain hood to prevent birds, insects, and weather from entering.
Recirculating hoods aren’t ducted: they filter air and push it back into the kitchen using charcoal filters. They’re cheaper to install but significantly less effective at removing moisture and heat. They’re a last resort if ducting truly isn’t possible. Design-conscious homeowners often accept the installation cost of proper ducting rather than compromise on performance.
Choosing the Right Size and CFM Rating
Size involves two considerations: visual proportions and airflow needs.
Width: A hood should match or slightly exceed your cooktop width. A 36-inch cooktop pairs with a 36-inch or 42-inch hood: anything narrower won’t capture all vapors at the edges. An island hood should extend at least 6 inches beyond the cooktop on each side for optimal capture.
CFM Rating: Use this formula as a starting point: CFM = (cooktop BTU ÷ 100) + 100. A gas cooktop with four burners at 12,000 BTU each totals 48,000 BTU, so: (48,000 ÷ 100) + 100 = 580 CFM minimum. If you cook frequently with high heat (searing, wok cooking, or frying), bump up 20–30% higher.
Wall-mounted hoods can be slightly lower CFM than island hoods (which capture vapors rising straight up from all sides). Islands need more power because air escapes sideways more easily. The Kitchn and similar kitchen-focused sites often discuss how homeowners underestimate CFM needs and regret it after installation.
Noise: Hoods at 70+ decibels are noticeably loud, like a vacuum cleaner running. At 60 decibels or below, you can talk over it. High CFM hoods are inherently louder, so expect some noise if you buy a powerful model. Check decibel ratings in product specs.
Maintenance and Care Tips
A well-maintained hood lasts 15–20 years: neglected ones clog and fail within 5–7 years.
Filter Cleaning: Clean baffle filters monthly if you cook daily, or every other month for lighter use. Remove the filters (most slide out from the front), soak them in hot soapy water or run them through the dishwasher, and allow them to dry completely before reinstalling. Charcoal filters in recirculating hoods can’t be cleaned, only replaced every 3–6 months, which gets expensive.
Exterior and Fan Blades: Wipe down the hood’s exterior monthly with a damp cloth and mild degreaser. Grease buildup on stainless steel looks dingy fast. The fan blades inside accumulate grease over time: most manufacturers recommend professional cleaning every 1–2 years if you cook heavily.
Damper Check: Open and close your ductwork damper manually (or listen for an automatic damper opening when the fan runs and closing when it shuts off). A stuck or missing damper defeats the whole system by allowing backdrafts.
Ductwork: Every 2–3 years, inspect ductwork for disconnections, crushed sections, or leaks. Grease can accumulate inside ducts: professional duct cleaning ($300–$600) removes buildup and restores airflow. This is especially important in commercial kitchens or homes where someone cooks daily with high heat.
When in doubt, consult your hood’s manual, different models have specific maintenance schedules and cleaning products to avoid (some finishes won’t tolerate abrasive cleaners).